
This page walks through a response from start to finish. Most suppliers need only two things: the request email, and the compliance documents they already have.
Step 1: Open the portal and sign in
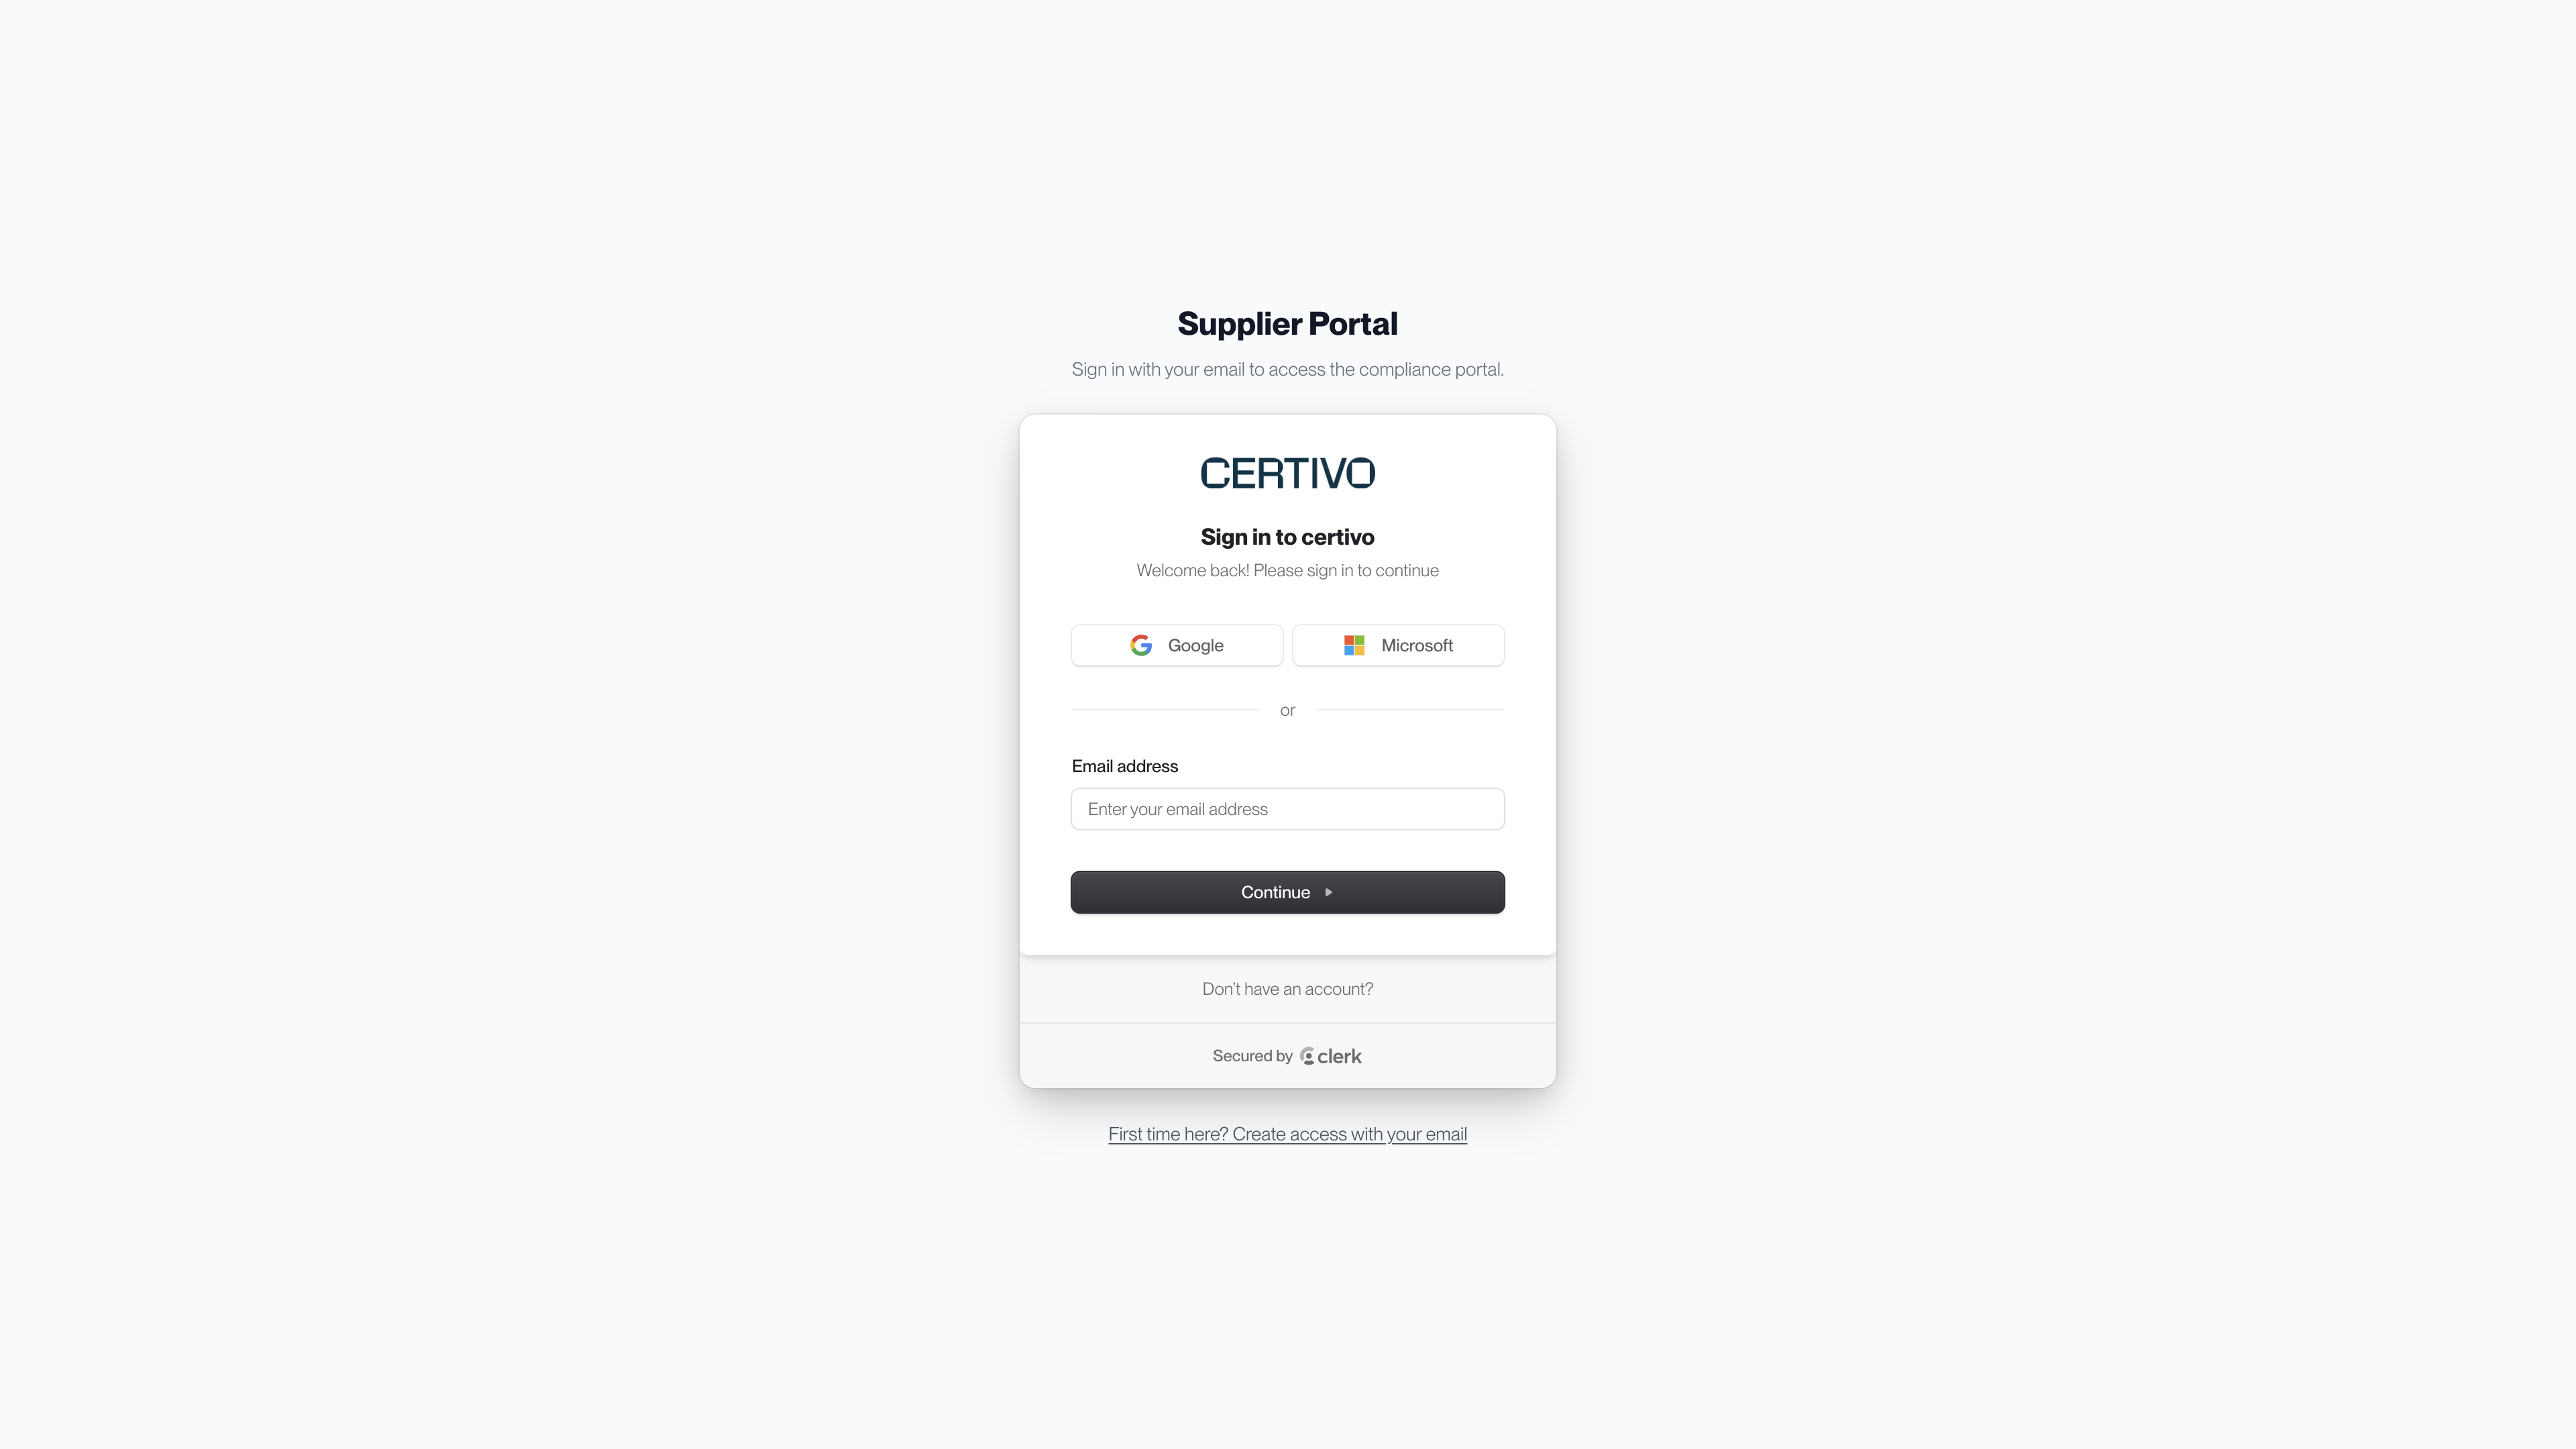
- Select Access Vendor Portal in the request email.
- On the page headed "Supplier Portal", enter your email address and select Continue. If this is your first visit, select First time here? Create access with your email first.
- Enter the one-time code sent to that address.
If your work email is a Google or Microsoft account, you can use the Google or Microsoft button instead.
 (opens a larger view)
Use the address the request was sent to. A colleague can also sign in with their own work address, as long as it is at the same company email domain. See Sign in and give colleagues access.
Step 2: Find your requests
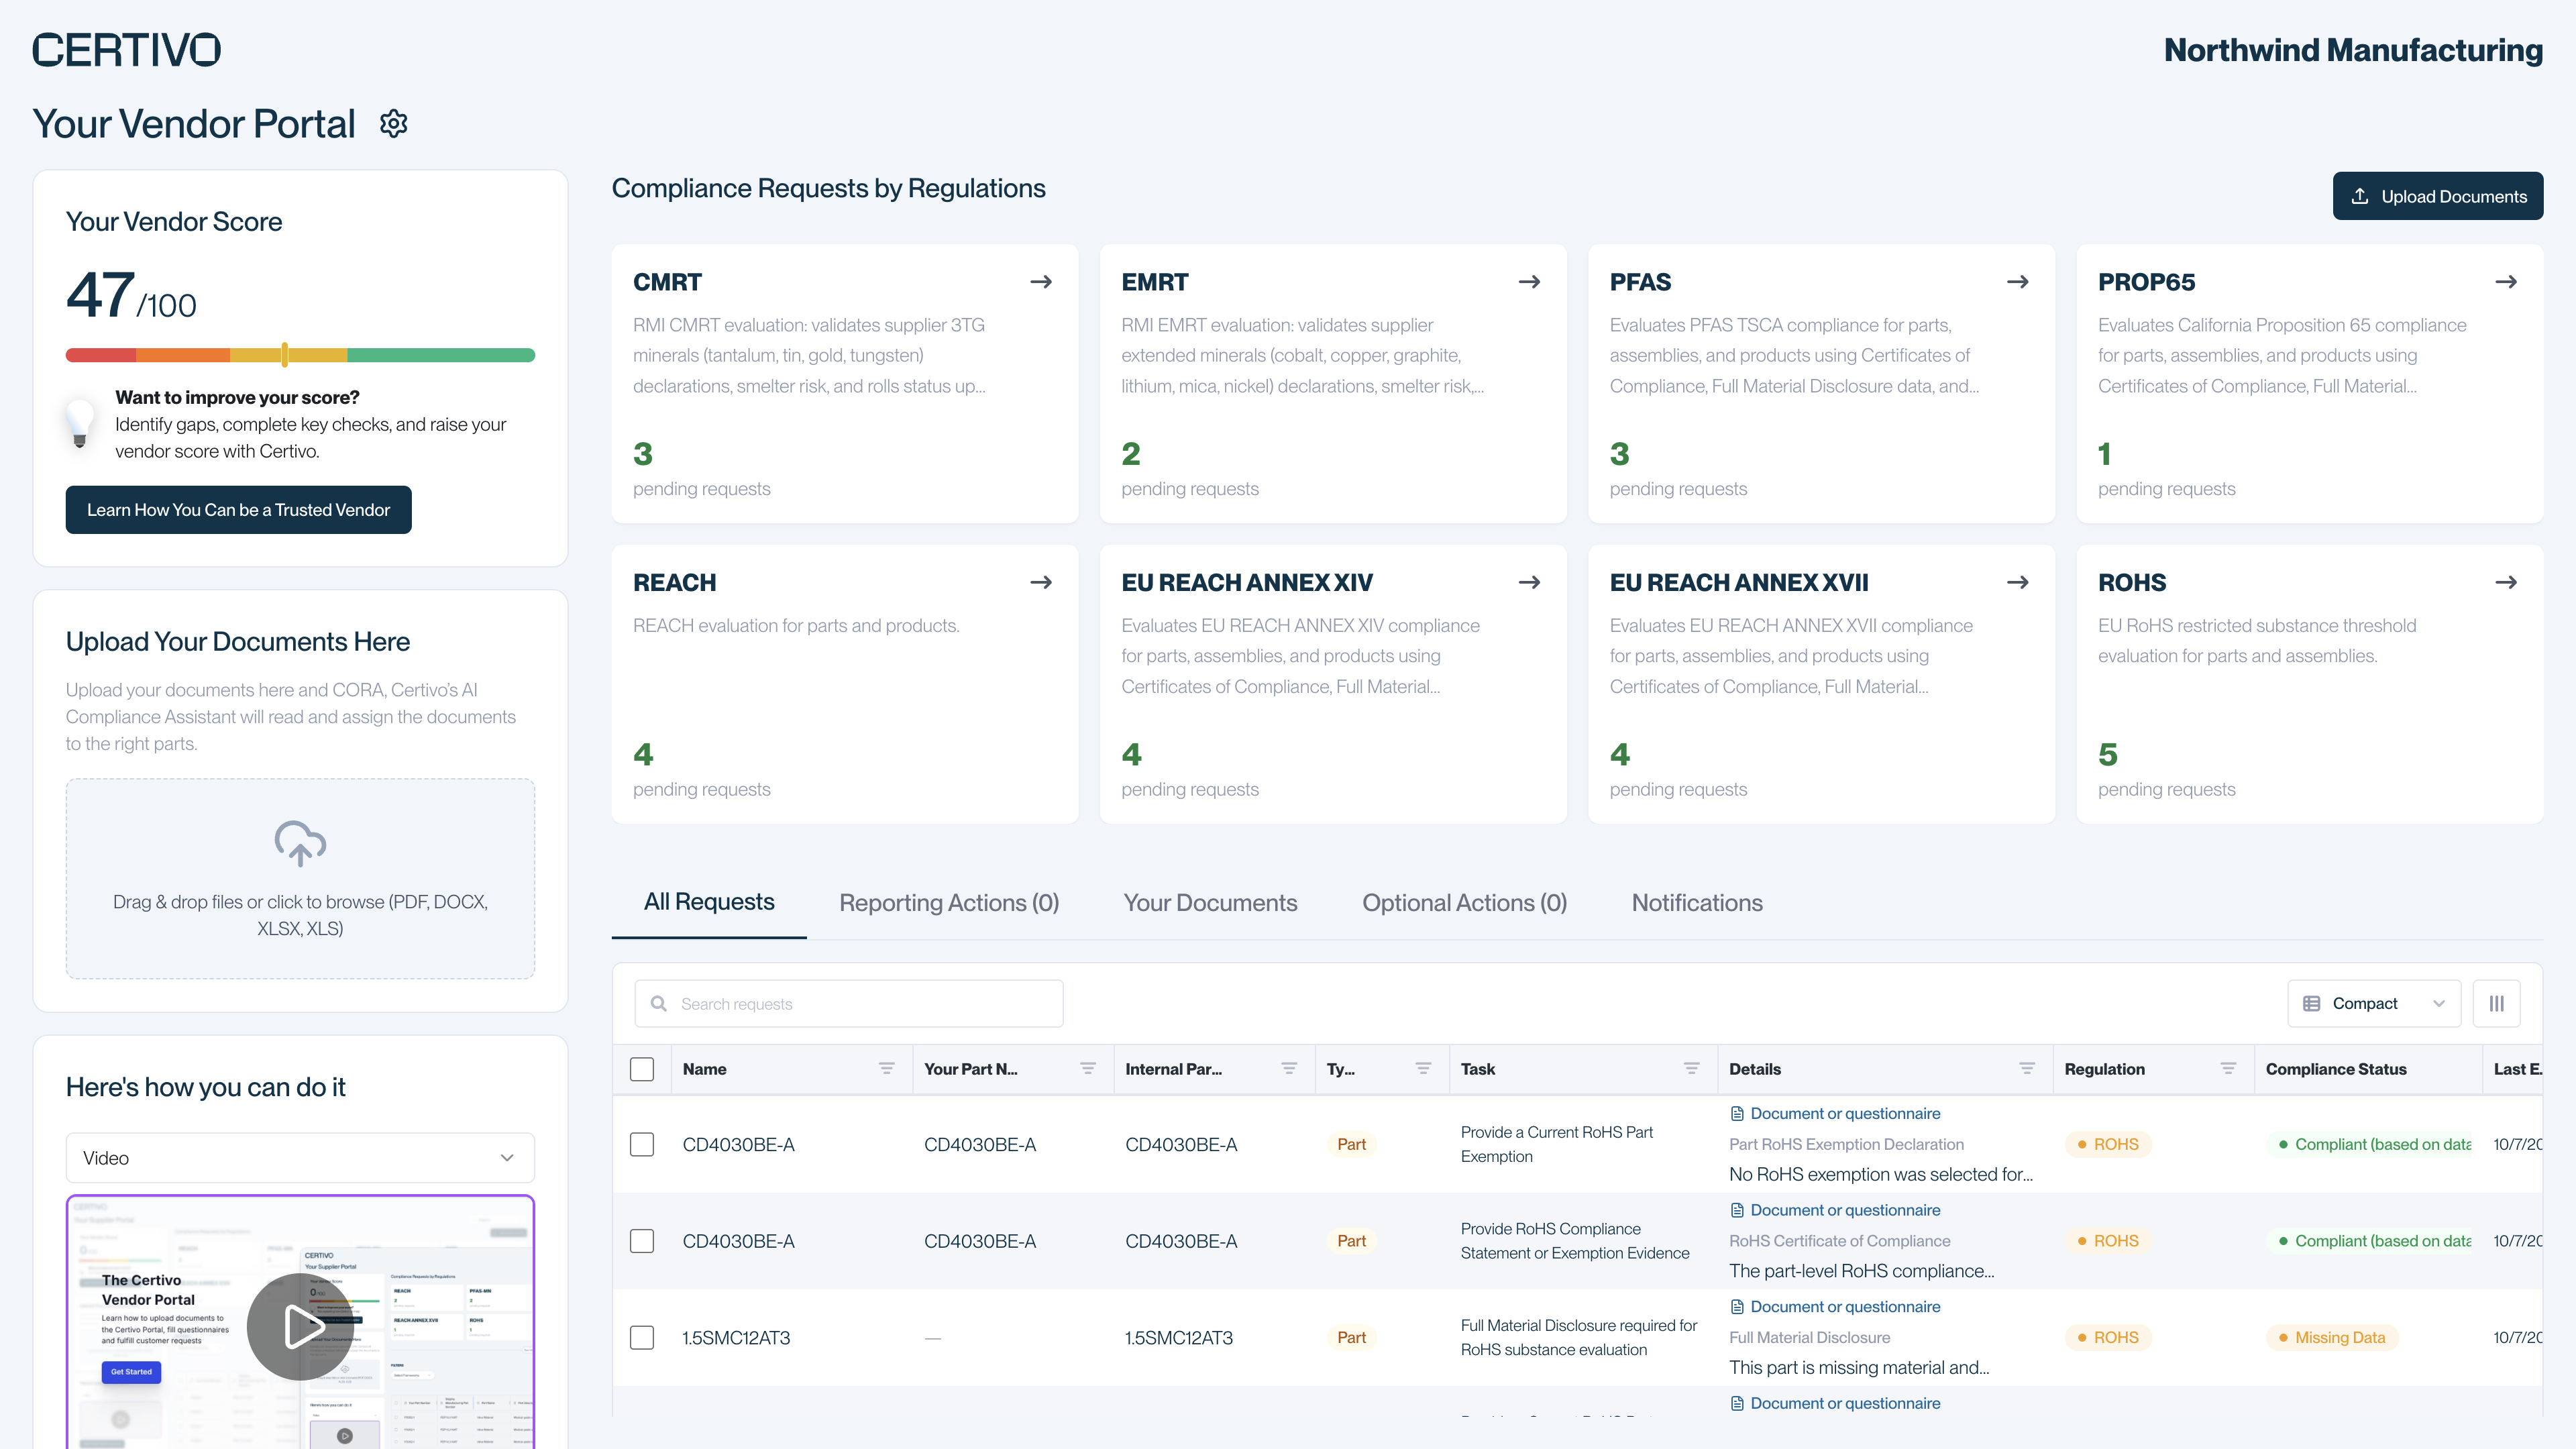
The portal opens on a page headed "Your Vendor Portal". Your customer's name is at the top right.
 (opens a larger view)
- Compliance Requests by Regulations shows one card for each regulation, with the number of pending requests. Select a card to see only that regulation.
- All Requests lists your open requests. Each row is one request about one thing: a part, a product, or your company as a whole. Reporting requests and optional requests, if you have any, are on the Reporting Actions and Optional Actions tabs.
- Notifications lists regulatory updates and announcements your customer has sent you. A red number on the tab shows how many you have not read. They are for your information and do not need an answer.
In each row, three columns tell you what is needed:
| Column | What it tells you |
|---|---|
| Task | What your customer needs, for example "Provide RoHS Compliance Statement or Exemption Evidence" |
| Details | A description of the request. When a document is accepted, a label says whether it is required or a questionnaire will also do. |
| Regulation | The regulation the request belongs to |
Use Search requests above the table to find a part number or name.
Step 3: Answer a request
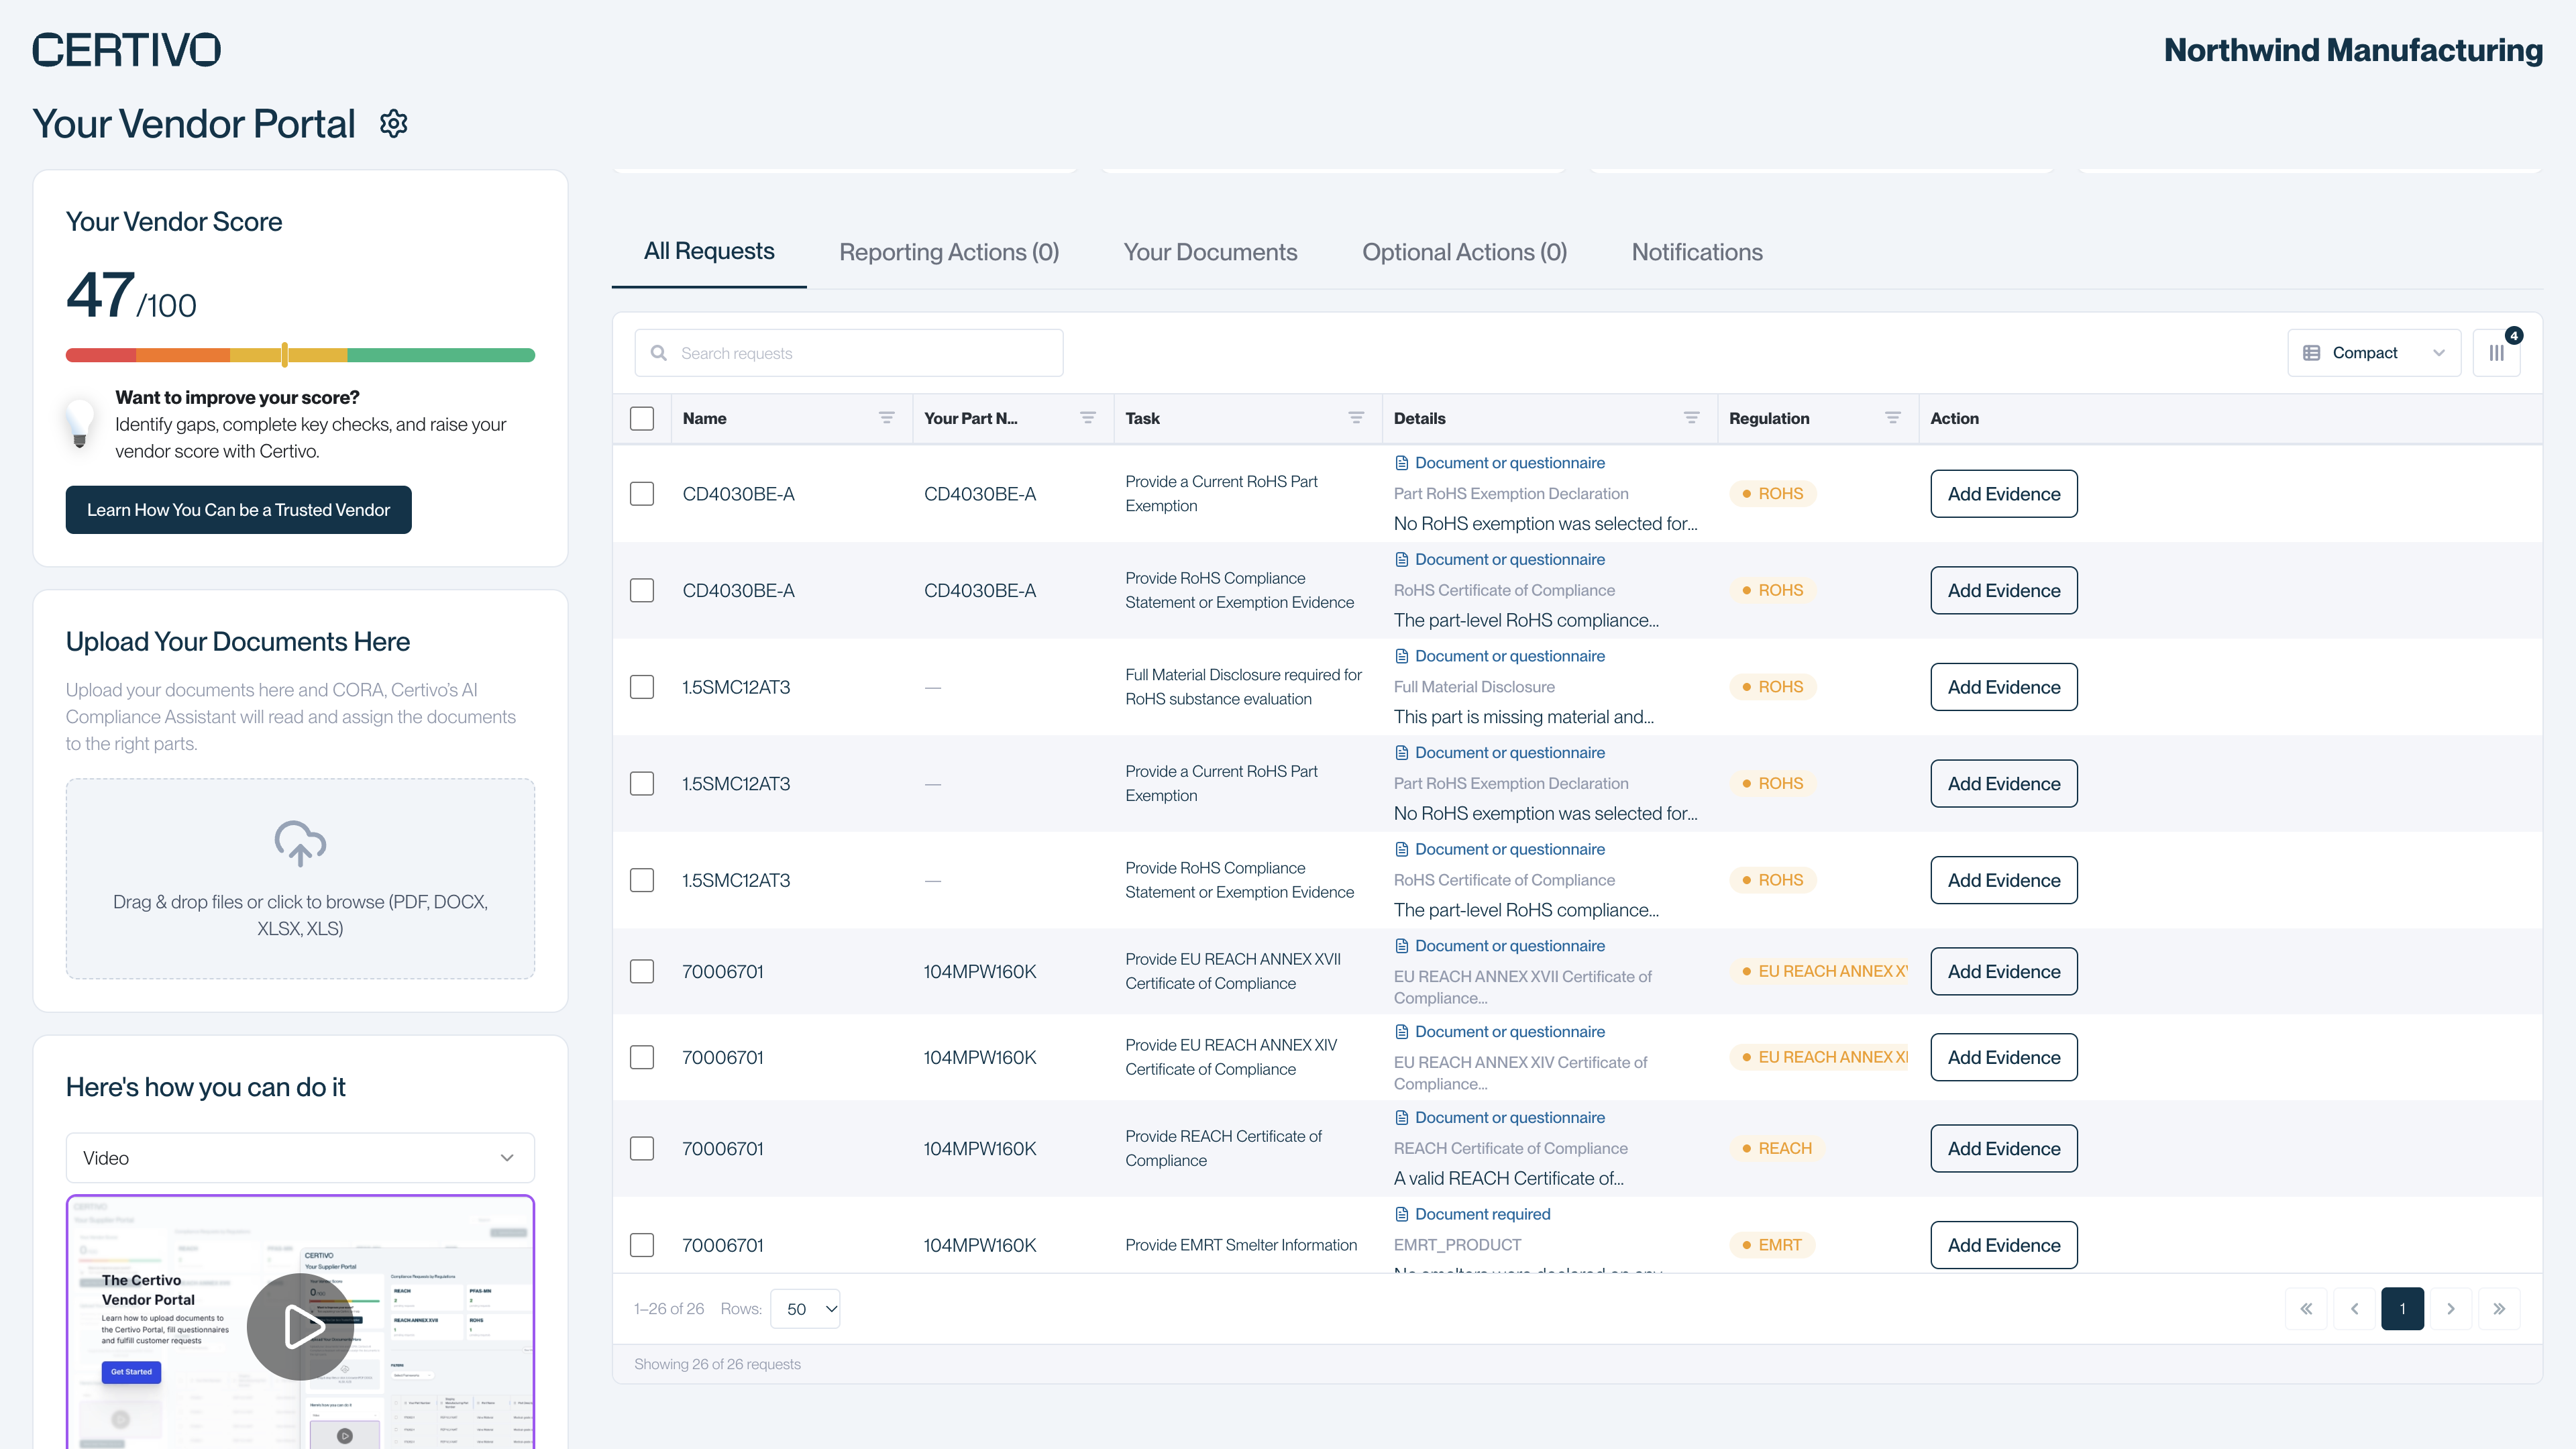
The button in the Action column shows how you can answer. If a row shows "No evidence action available" instead of a button, send your document with Upload Documents at the top of the page.
 (opens a larger view)
Upload Document
Select Upload Document and choose one or more files from your computer. The upload is tied to that request.
Add Evidence
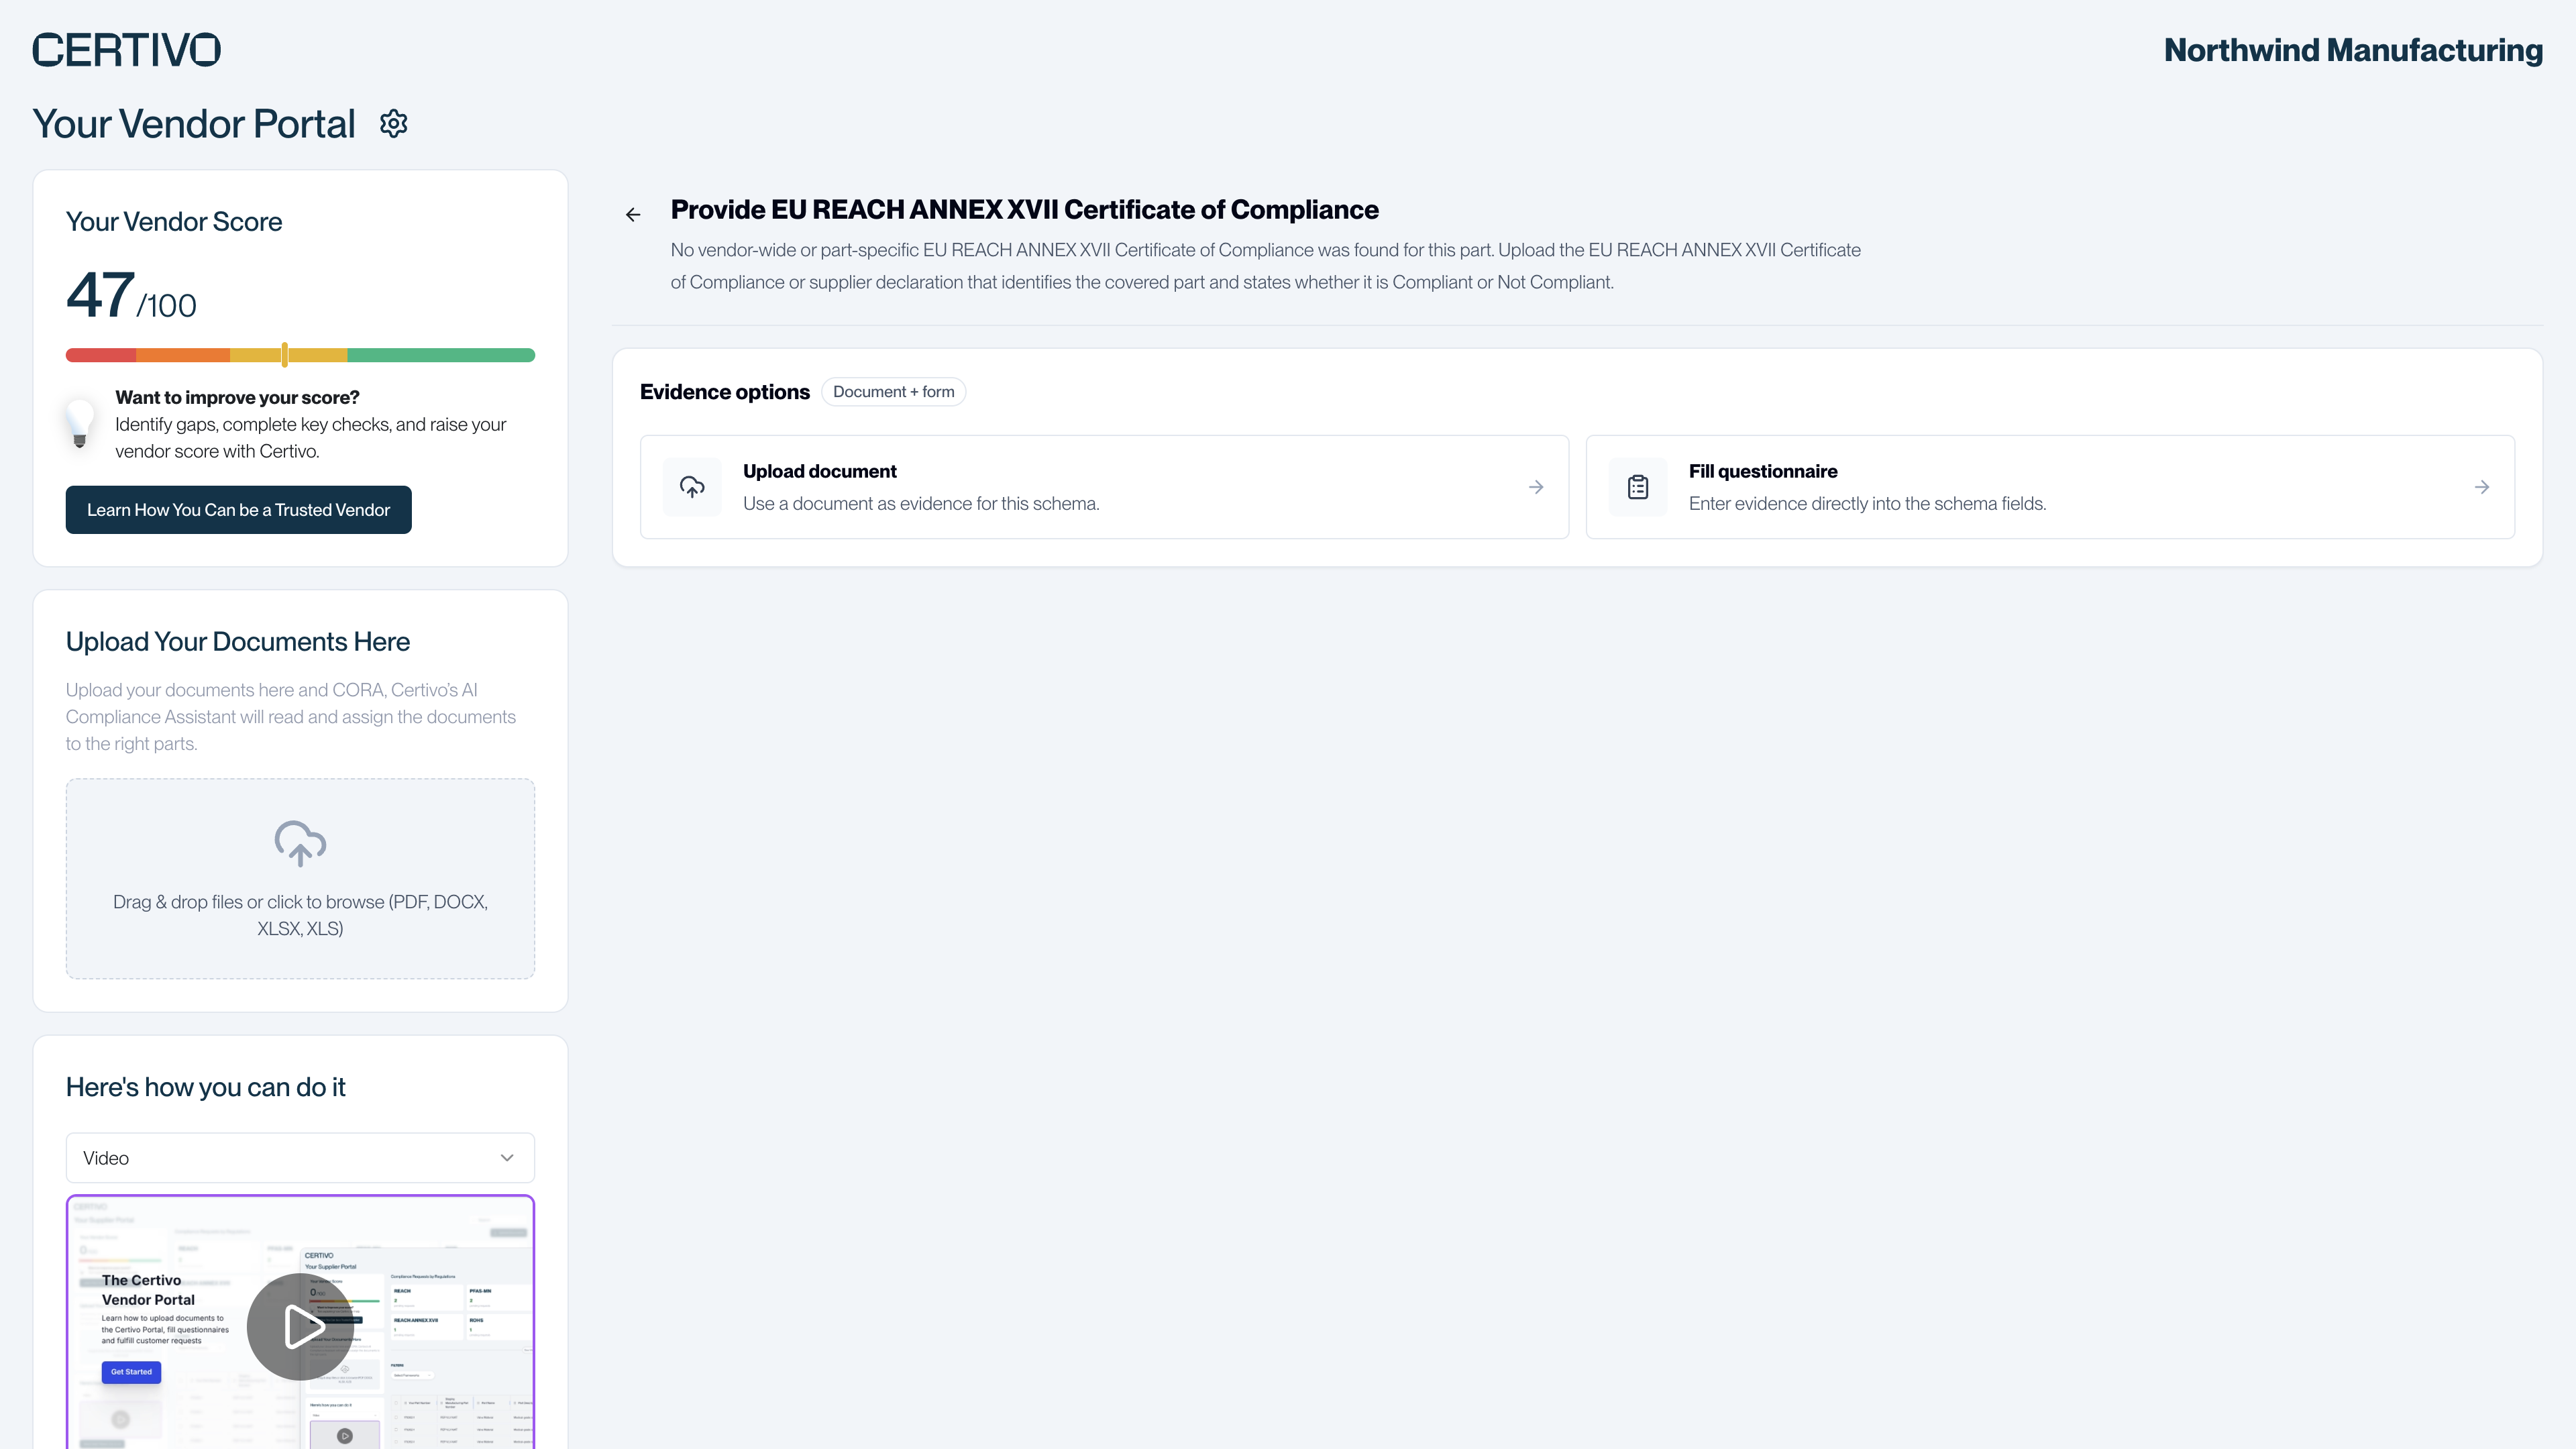
Add Evidence appears when a request accepts a questionnaire, or can be answered in more than one way. If there is a choice, you see:
- Upload document to send a file, or
- Fill questionnaire to type the answers into a form.
If only a questionnaire is accepted, it opens straight away.
 (opens a larger view)
For conflict minerals requests you may also see Generate CMRT or Generate EMRT. It opens a form with your company and part details filled in. Complete it, and the portal creates the reporting template, downloads a copy for you and submits it.
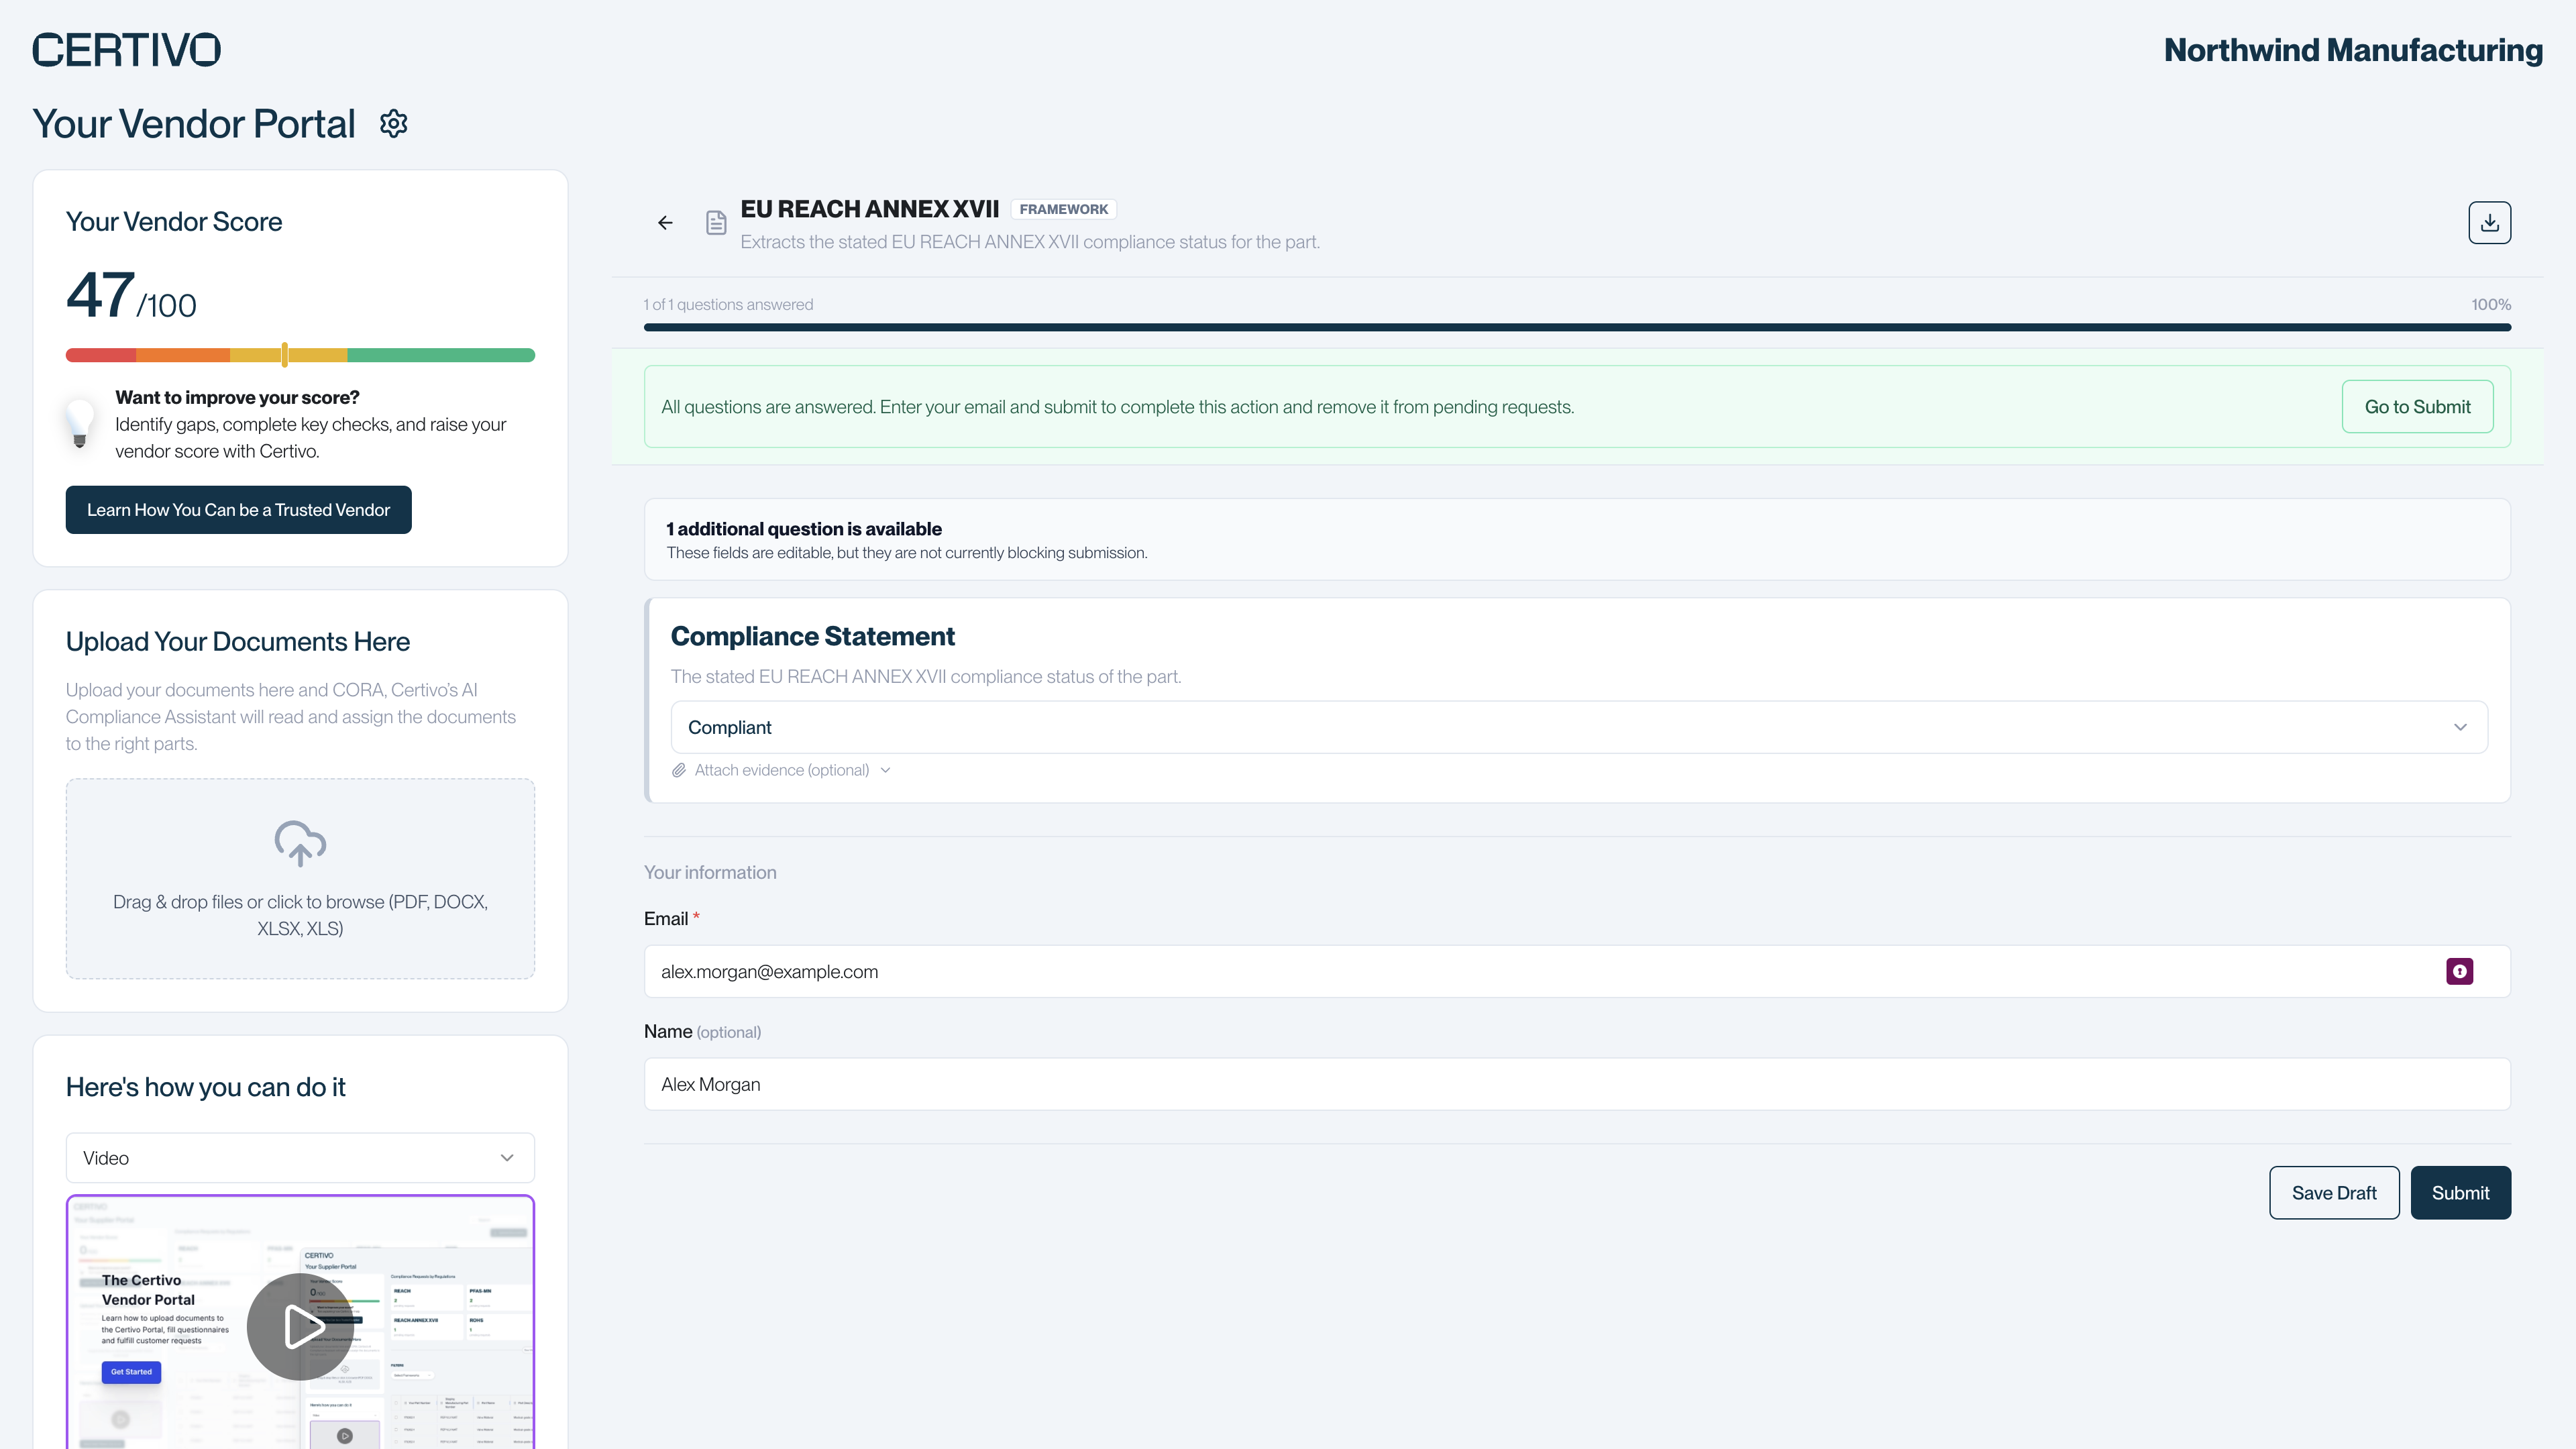
Fill in a questionnaire
 (opens a larger view)
- Answer the questions. A progress bar shows how many are left, and a notice at the top tells you if any are required.
- If you want to back up an answer, select Attach evidence (optional) under the question.
- Under "Your information", check your email address.
- Select Submit.
Select Save Draft to stop and come back later. Your draft is waiting the next time you open the same request.
Answer several requests at once
When many parts need the same answer, you can answer once.
- On the All Requests tab, tick the box at the start of each row. The box in the header selects every request that matches your search and filters.
- Select Add Evidence above the table. The portal groups your selection by the evidence each request needs.
- In a group that offers it, select Fill questionnaire. Your answers are applied to every request in that group. A few questionnaires can only be submitted for one request at a time, and the form tells you when that is the case.
Upload document in a group attaches the file to the first request in the group only. To send one document that covers many parts, use the upload box described next.
Upload documents without choosing a request
If you already have certificates that cover many parts, use Upload Your Documents Here on the left of the page, or the Upload Documents button. Certivo reads each document and assigns it to the right parts.
This box accepts PDF, DOCX, XLSX and XLS files, up to 5 files at a time and 50 MB each. For other formats, see The documents you may be asked for.
Prefer email?
You can reply to the request email with your documents attached as PDF files. Your customer receives them and reviews each one. Documents sent by email are not tied to a specific request. In the portal you can attach a document to the exact request it answers.
What happens next
A request stays in your list until your customer's checks pass on your response. For an uploaded document, that includes a review by your customer. See What happens after you respond.